Deploy an Azure Analysis Services model from source control using Azure DevOps pipelines
Introduction
On my quest to automate all deployments, CI/CD pipelines for Analysis Services Tabular models is not something many have pre-built tools for. Luckily I’ve met some very smart developers who have written scripts to automate this. By combining a few of their scripts, I have been able to fully automate the deployment of an Azure Analysis Services model from an Azure DevOps repo using PowerShell and Azure Pipelines.
Step 1: Create a service principal in Azure Active Directory
If you aren’t familiar with service principals, think of it as a username/password that is assigned to an application to allow it to login to another. To automate the deployment you will need a service principal that Azure DevOps can use to authenticate with your Azure Analysis Services server. Make sure to assign this service principal the contributor role for the model in the Azure Portal and also add it as an analysis services administrator for the server using a tool like SSMS (using the format app:{app-id}@{tenant-id}).
I need to create a more detailed walkthrough for this step, but for now let me know if you need any help doing this! Here’s some good documentation.
Step 2: Add the PowerShell script to your repo and build pipeline
Add this PowerShell script to your project repo and push your changes to Azure DevOps. You will need to change line 21 of the script to match the name of the model you are wanting to replace during deployment.
You need to make sure this file is collected as an artifact during your Azure DevOps build pipeline run. Lines 75 - 89 of this example build script shows how you can collect all PowerShell scripts within your project as build artifacts.
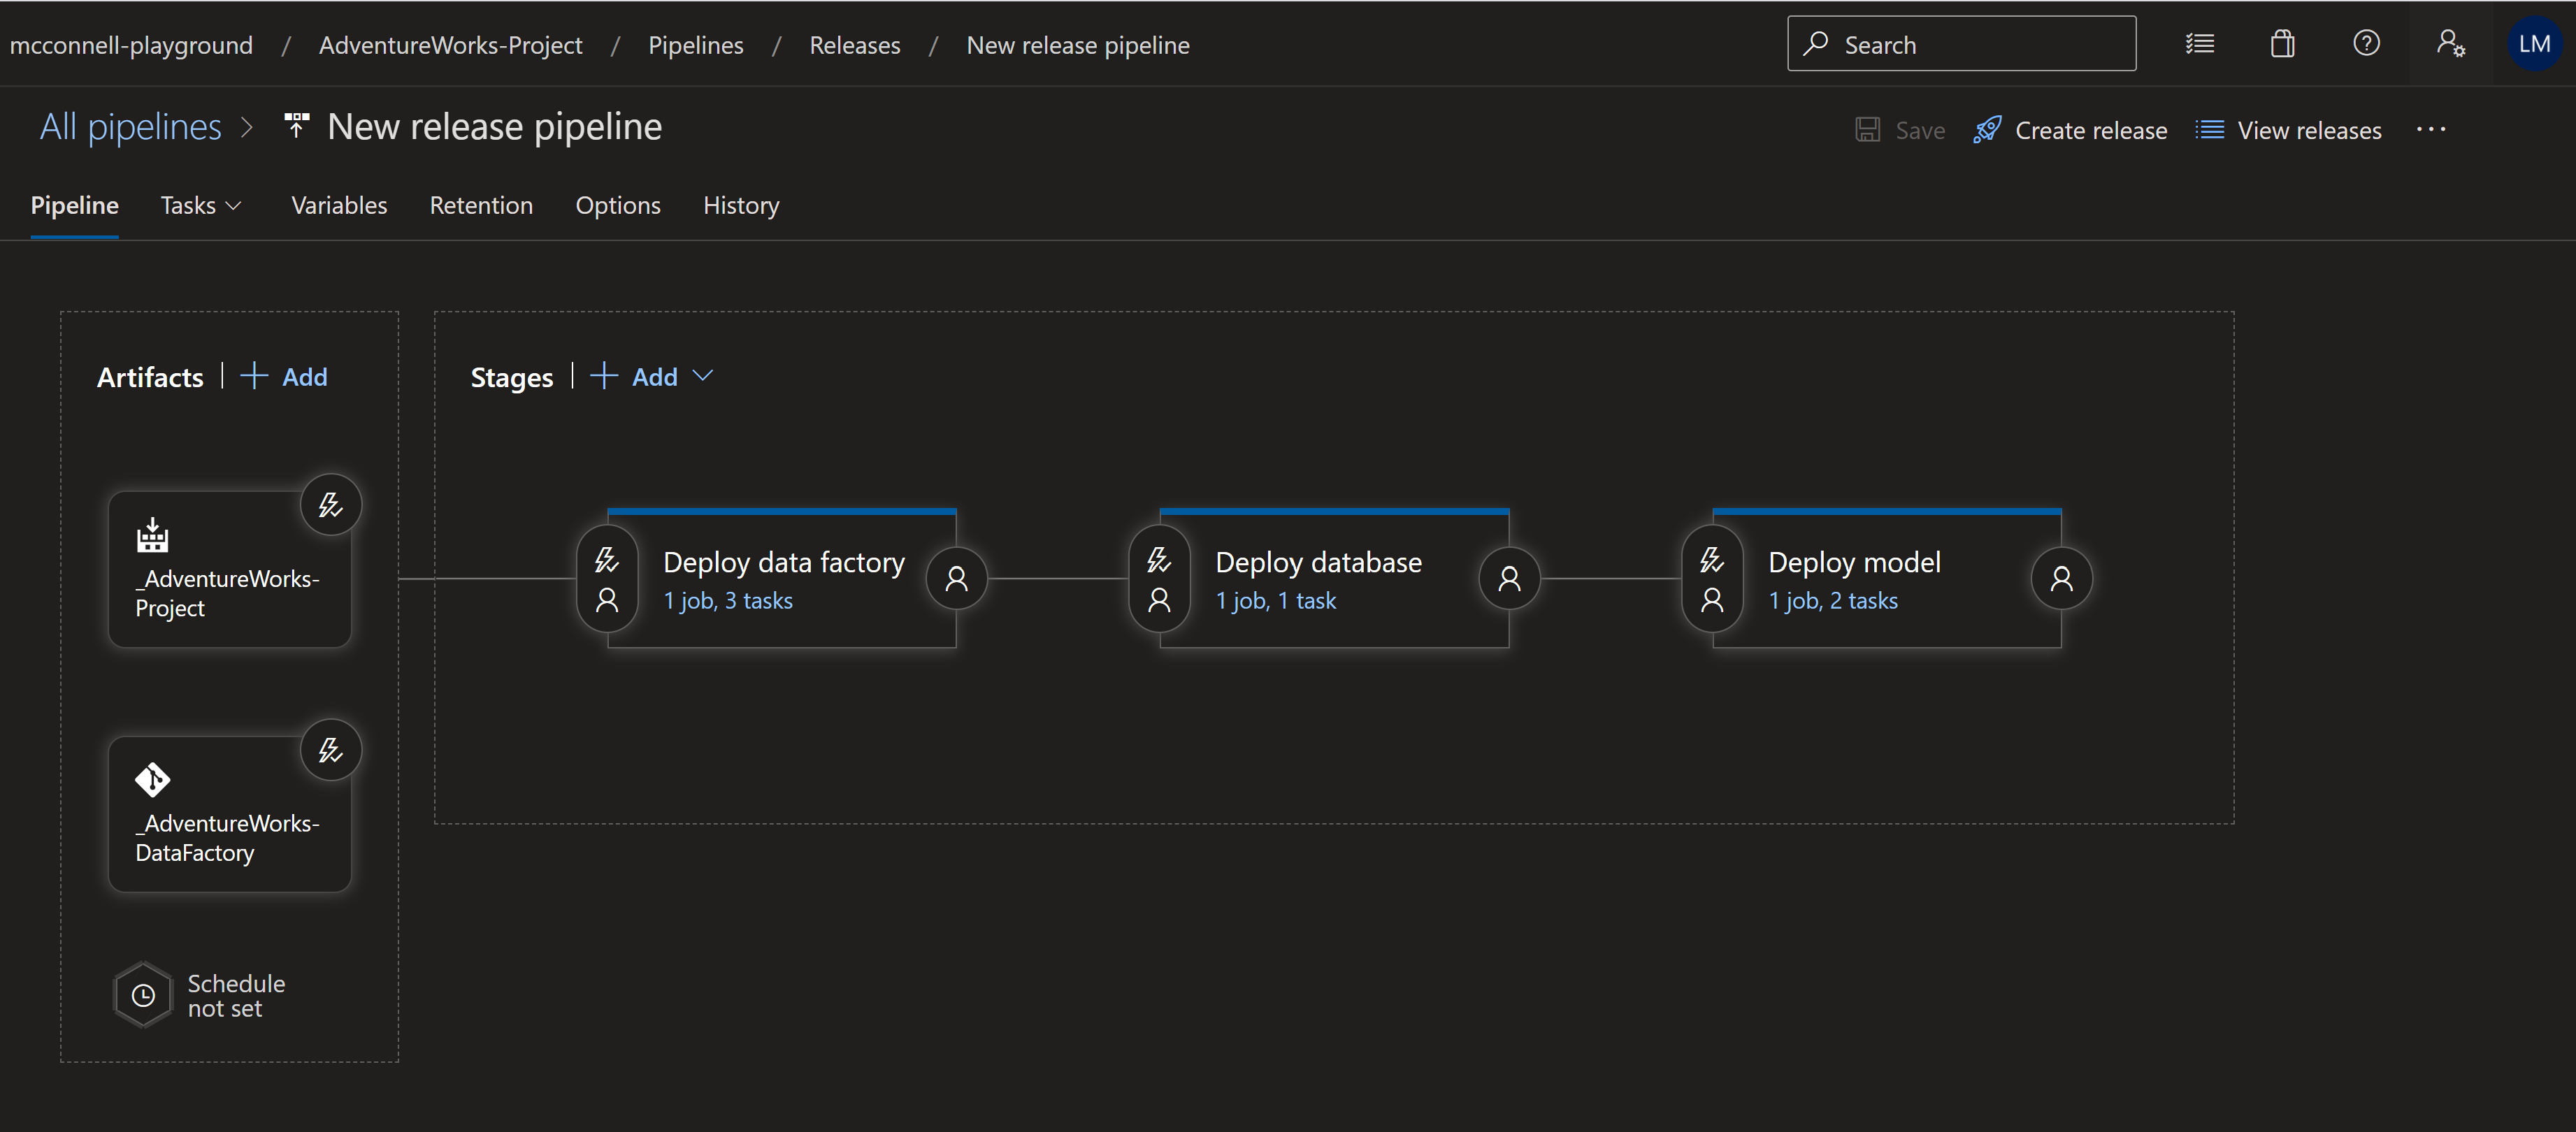
Step 3: Add a deployment stage to your release pipeline
You will need to add a step on the build pipeline to run this PowerShell script using the PowerShell Agent Job. I highly recommend using variables to store configuration details (such as the server name, service principal app id, tenant id) so that they can be securely controlled and easily changed. Here’s what my typical script deployment would look like (using variables to hide the actual values)
Step 4: (potentially required) Add DevOps IP address to the Azure Analysis Services Firewall Whitelist
I highly recommend that you utilize the firewall feature on your Azure Analysis Services servers to help protect the data you store in these models. However, if you are using the firewall, this will block DevOps from deploying your model. As the DevOps Agent Jobs run on an army of virtual machines, there is not a single IP address you can whitelist to allow this service through.
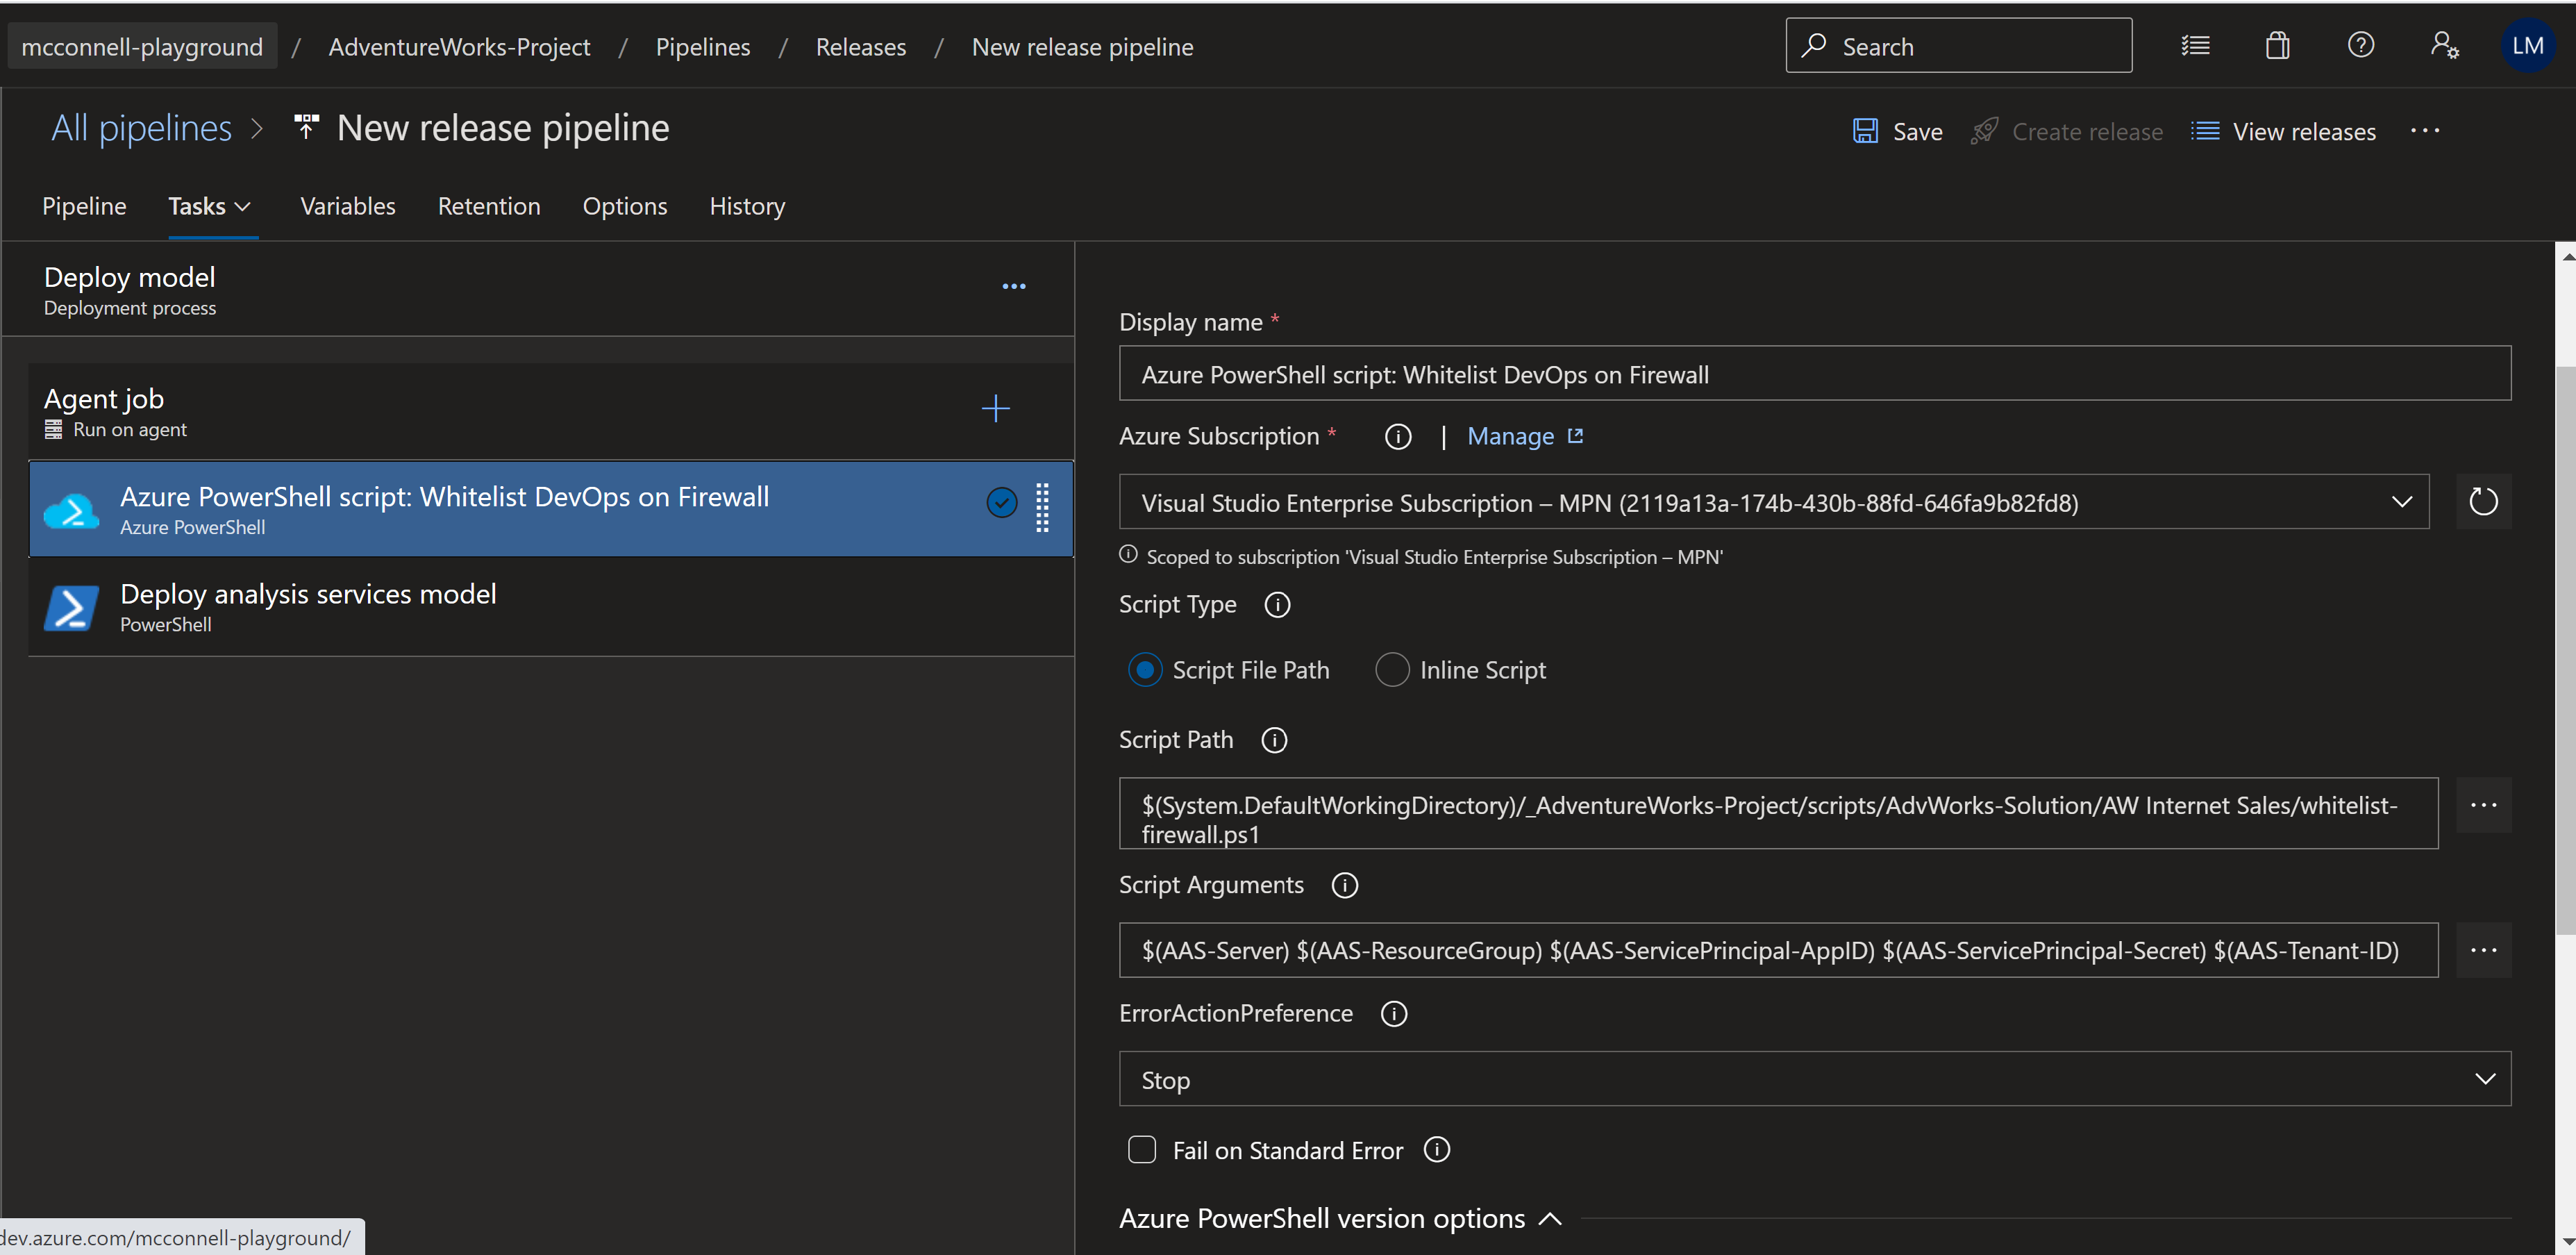
I found this PowerShell script which updates the server firewall rules to allow DevOps access. You can run it right before your deployment script in your build pipeline. Use the same process as above to get this script into your repo and then add a job to your build pipeline using the Azure PowerShell job. You will need to pass a few arguments into this script, pictured below. Before running for the first time, make sure you have a firewall rule on your AAS server named AzureDevOps. It doesn’t matter what IP address this is initially set to let through, as the script will update this rule every time it runs to the IP address of the machine running the agent job.
Step 5: Test the process end to end
Make a change to the tabular model in your source control repo and push it to the master branch. I usually add a new measure to the model, something like: Test := 150. When you push this change, confirms it builds and releases successfully and that you are able to see the change when connected to your model using Power BI or Excel.